


Learning DX Step-By-Step - #1
Tutorial #1 - HELLO WORLD
Wednesday, February 21, 2007 by RomanDA | Discussion: DesktopX Tutorials

 |
||
| Step-by-Step Tutorials |
#1 - Hello World |
|
|
A series by RomanDA |
||
|
Listing of other DX Tutorials: Click here Today's Lesson: "HELLO WORLD" the first program all programmers have to make. In this lesson we will cover how to create a simple text object, change its color, font, and size, we will even make it change color and size when we move our mouse over it. We will take this 1 step at a time, so you can follow along. For this and all the Step-By-Step DX Tutorials you will need to purchase DesktopX for $14.95 from Stardock. Lets get started. |
||
| STEP 1 - Load DesktopX | ||
|
Once you have DesktopX
installed, look in your Start Menu for "Object Desktop" then for "DesktopX",
click it to load the program.
You will see the DesktopX
STARTUP Screen
(yours wont say PROFESSIONAL unless you purchased PRO)
It will load the DesktopX
SETTINGS Window:
We just wish to get these screens out of the way for now, we are not going to use them. Click "CANCEL" on the SETTINGS window, and DONE on the STARTUP Screen. You should have a blank
screen now with a new icon in your system tray:
|
||
| STEP 2 - Create an object | ||
|
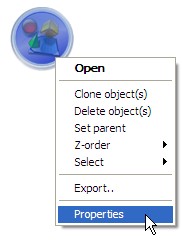
RIGHT CLICK on the
|
||
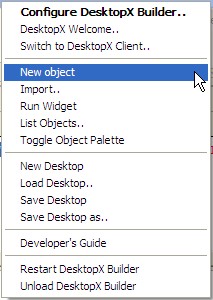 |
You will need to select the "NEW OBJECT" item on this menu. | |
|
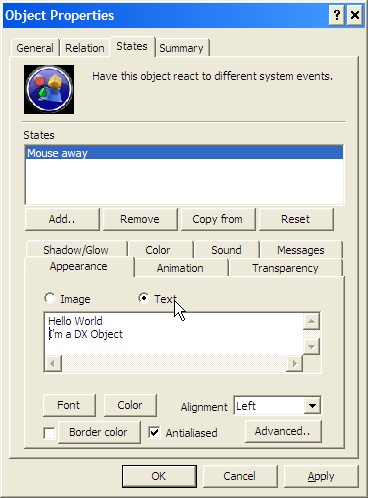
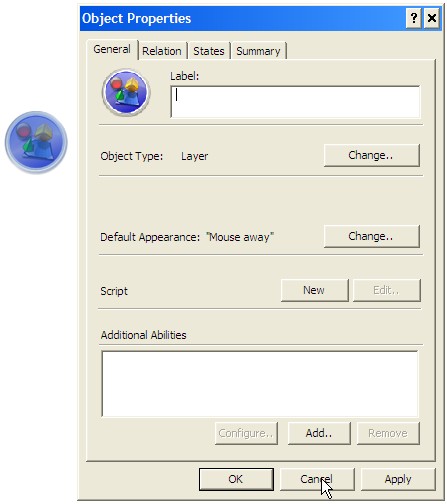
You will see the OBJECT
PROPERTIES window below (as well as the object itself).
This window will be referenced over and over in these tutorials.
IE: Open Properties / Select States
(which would mean to select the States TAB in the
Properties window)
You can access this
properties window at any time by RIGHT-CLICKING on the object and
selecting PROPERTIES.
|
||
| STEP 3 - ADDING THE HELLO WORLD TEXT | ||
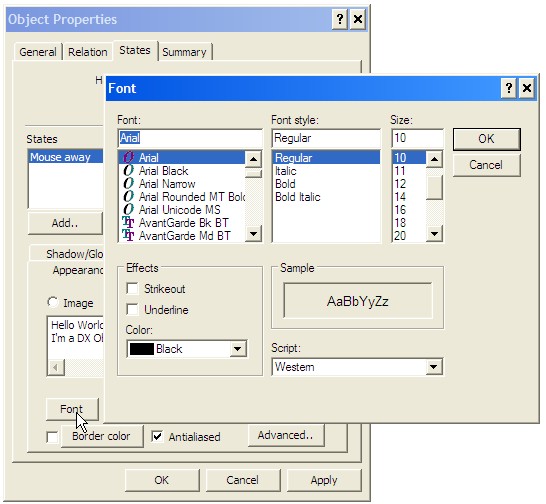
When you added the object,
it brought up the PROPERTIES window, now select the "STATES" tab to
change to this TAB.
|
||
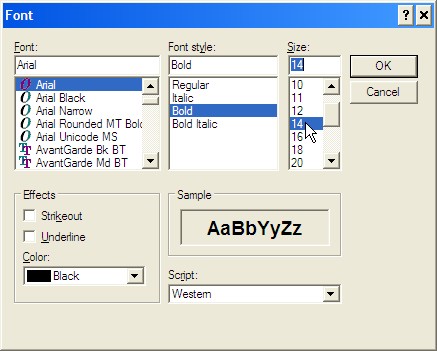
| STEP 4 - Changing the FONT/STYLE/SIZE | ||
|
||
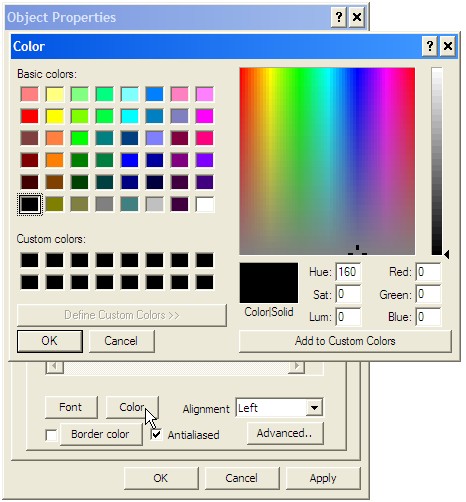
| STEP 5 - Changing the FONT COLOR | ||
|
||
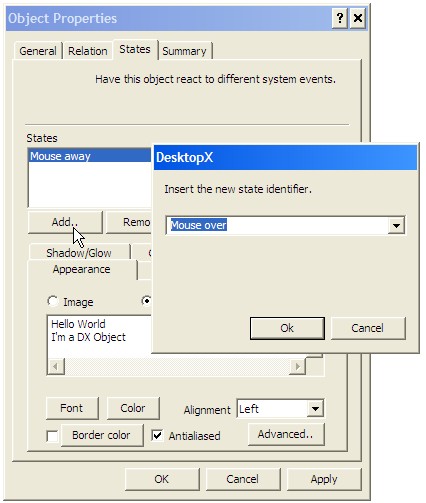
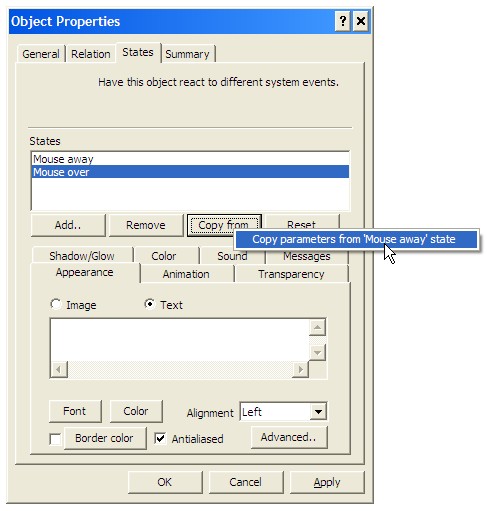
| STEP 6 - Creating a MOUSE-OVER/OUT Effect | ||
|
Ok, so we have our text, its
boring, its just sitting there doing NOTHING. Don't you want to
have it change color, style, font, or size you move your mouse over it? Well, in DX this is VERY simple.
Test it out, move your mouse over the object and see what it does. |
||
| CONCLUSION | ||
|
Ok, you have made your first
DX Object, now what? Check back as I add new Step-By-Step Tutorials on how to make this a link to a folder, web-site, or just about anything you want! I hope you have enjoyed this step into DX, and look forward to the next installment.
|
||
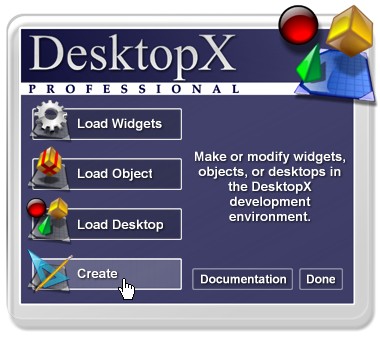 One you see this screen,
click on "CREATE" because we want to CREATE a new Widget.
One you see this screen,
click on "CREATE" because we want to CREATE a new Widget.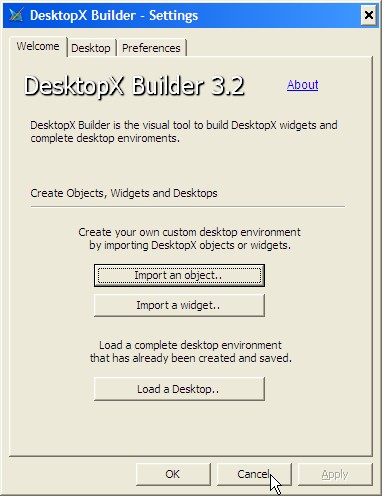
Reply #3 Wednesday, February 21, 2007 9:41 AM
yes, but no one wants to use that one.
A go away Romanda would be a big seller.
Reply #4 Wednesday, February 21, 2007 9:42 AM
im so glad this was simple to follow.. i have a lot more planned, just need to get TIME to do them, and since time = money, if i could get $1 from everyone who uses these, id have... $1 lol..
Reply #5 Wednesday, February 21, 2007 12:15 PM
Reply #6 Wednesday, February 21, 2007 12:30 PM

Reply #9 Wednesday, February 21, 2007 8:13 PM
Reply #10 Thursday, February 22, 2007 7:28 AM
I will also be uploading #3 today as well "ATTACK OF THE CLONES" As soon as I have a link, it will be added.
Reply #11 Friday, February 23, 2007 1:41 PM

Not as easy as you would think - I've tried.

Reply #12 Friday, February 23, 2007 4:13 PM
Not as easy as you would think - I've tried.
kind of like this:
Function Object_OnLButtonUp(x,y,dragged)
	Const MYCOMP = &H11
 	On Error Resume Next
 	With CreateObject("Shell.Application")
   	Set objFolder = .NameSpace(MYCOMP)
     	.Explore objFolder.self.path
   	Set objFolder = nothing
 	End With
End Function
Reply #14 Sunday, February 25, 2007 10:26 AM
Reply #15 Monday, March 12, 2007 6:58 PM
Great Job!
Reply #16 Sunday, July 6, 2008 2:35 AM
looking forward to the other tutorials

Reply #17 Saturday, February 28, 2009 12:22 PM
Reply #18 Monday, September 28, 2009 6:28 PM


Please login to comment and/or vote for this skin.
Welcome Guest! Please take the time to register with us.
There are many great features available to you once you register, including:
- Richer content, access to many features that are disabled for guests like commenting on the forums and downloading skins.
- Access to a great community, with a massive database of many, many areas of interest.
- Access to contests & subscription offers like exclusive emails.
- It's simple, and FREE!
Reply #1 Wednesday, February 21, 2007 9:13 AM
It's My Secret